Nexus支持Composer仓库
一、简介
Nexus 3 默认暂不支持PHP Composer仓库,但是可以通过第三方插件支持
插件Github地址:https://github.com/sonatype-nexus-community/nexus-repository-composer
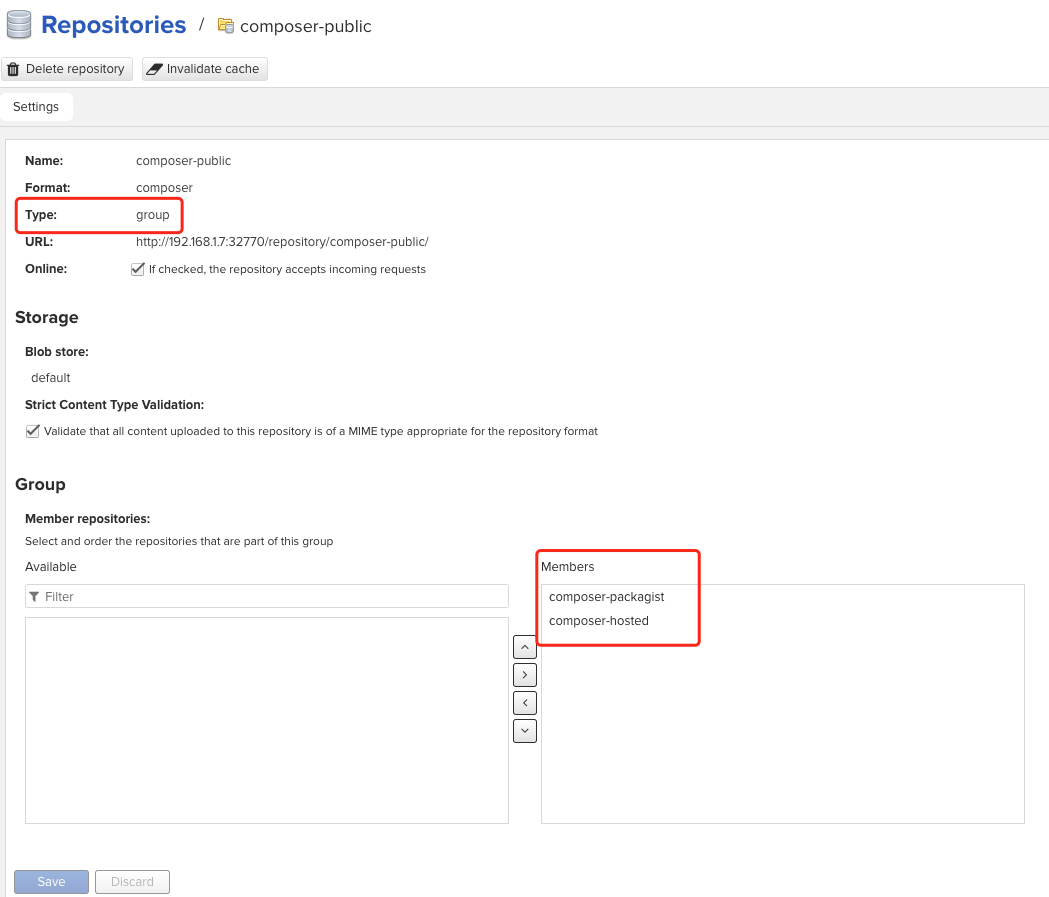
- Group类型仓库
composer-publiccomposer-packagistcomposer-hosted
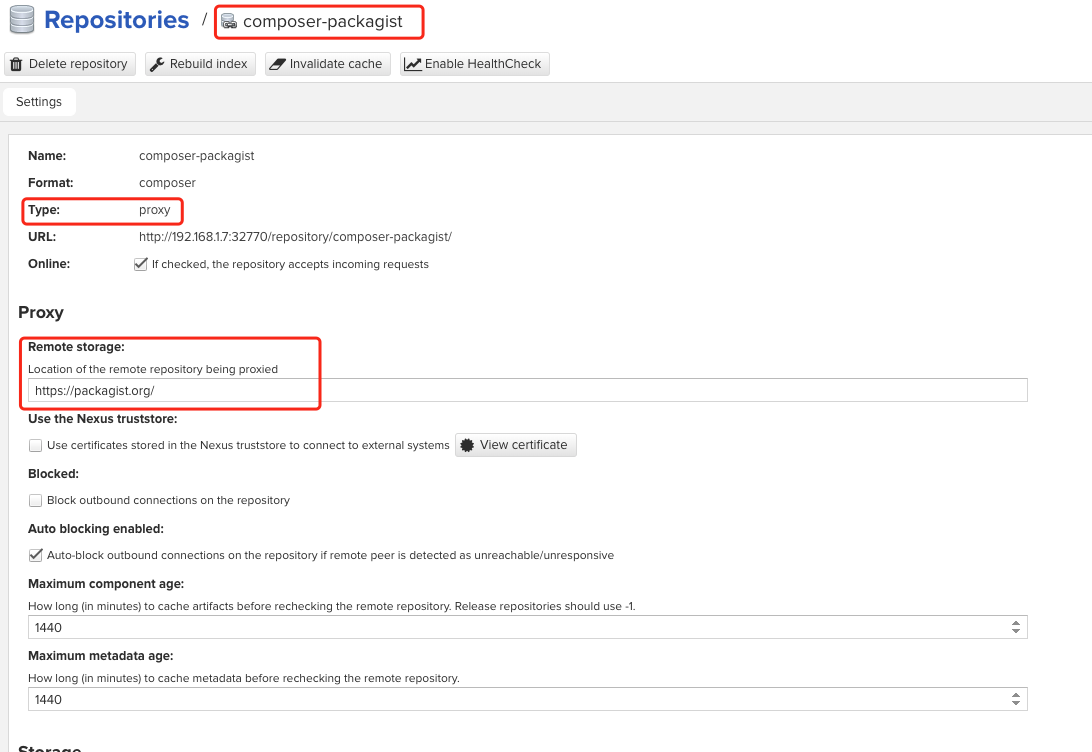
- Proxy类型仓库
composer-packagist:https://packagist.org/
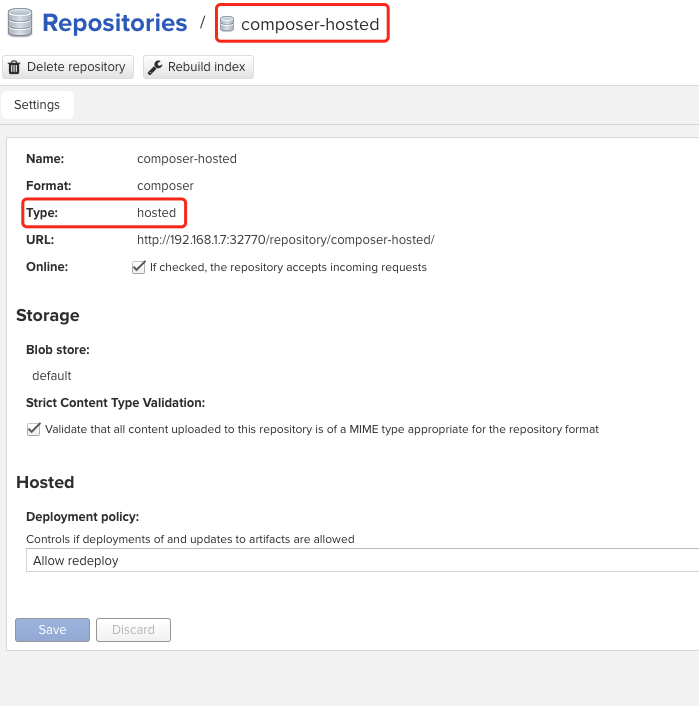
- Hosted类型仓库
composer-hosted
二、编译、安装插件
git clone  https://github.com/sonatype-nexus-community/nexus-repository-composer.git
mvn clean package
# 编译成功后,生成的Jar包在nexus-repository-composer/target下
将插件jar包放到
<nexus_dir>/system/org/sonatype/nexus/plugins/nexus-repository-composer/0.0.2/nexus-repository-composer-0.0.2.jar编辑
<nexus_dir>/system/org/sonatype/nexus/assemblies/nexus-core-feature/3.x.y/nexus-core-feature-3.x.y-features.xml,添加<feature prerequisite="false" dependency="false">nexus-repository-rubygems</feature> + <feature prerequisite="false" dependency="false">nexus-repository-composer</feature> <feature prerequisite="false" dependency="false">nexus-repository-gitlfs</feature> </feature>+ <feature name="nexus-repository-composer" description="org.sonatype.nexus.plugins:nexus-repository-composer" version="0.0.2"> + <details>org.sonatype.nexus.plugins:nexus-repository-composer</details> + <bundle>mvn:org.sonatype.nexus.plugins/nexus-repository-composer/0.0.2</bundle> + </feature> </features>重启Nexus,看是否支持创建Composer仓库了

三、仓库配置
四、使用
1、安装Composer
curl -sS https://getcomposer.org/installer | php
mv composer.phar /usr/local/bin/composer
composer --version
2、Composer配置使用私有源
方式一:配置Composer全局使用私有源
①手动
composer config -g repo.packagist composer http://Neuxs-IP:8081/repository/composer-public/   # Composer默认使用ssl连接代理源,使用私有仓库源时,使用的HTTP,需要关闭SSL
composer config -g -- disable-tls true
composer config -g -- secure-http false
②使用crm工具
#安装
composer global require slince/composer-registry-manager ^2.0

# 添加公司内部的私有源
composer repo:add synology-nxus http://Neuxs-IP:8081/repository/composer-public/

# 查看所有的私有源
composer repo:ls

# 切换到私有源
composer repo:use synology-nxus
方式二:配置项目级别配置使用私有源
编写项目根目录下的composer.json
{
  "packagist.org": false ,
  "repositories": {
     "packagist": {
       "type": "composer",
       "url": "http://Neuxs-IP:8081/repository/composer-public/"
     }
  },
  "config": {
    "secure-http": false
  },
  "require": {
    "monolog/monolog": "1.0.*",
    "pugx/shortid-php":"v0.5.1"
  }
}
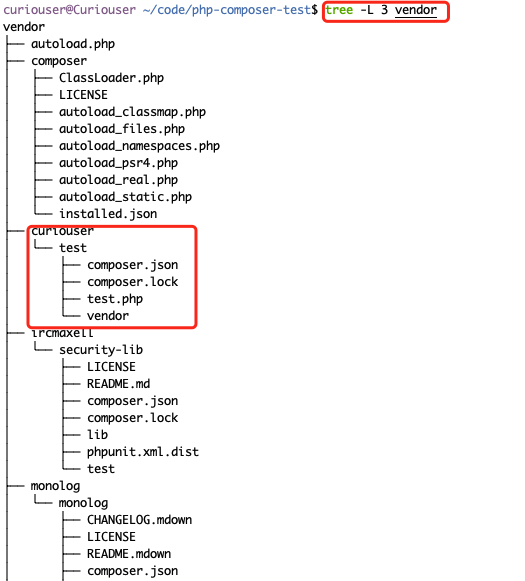
3、安装依赖
composer会根据当前路径下composer.json中写的下载依赖
composer install
# 依赖会被下载当前目录下的vendor文件夹中
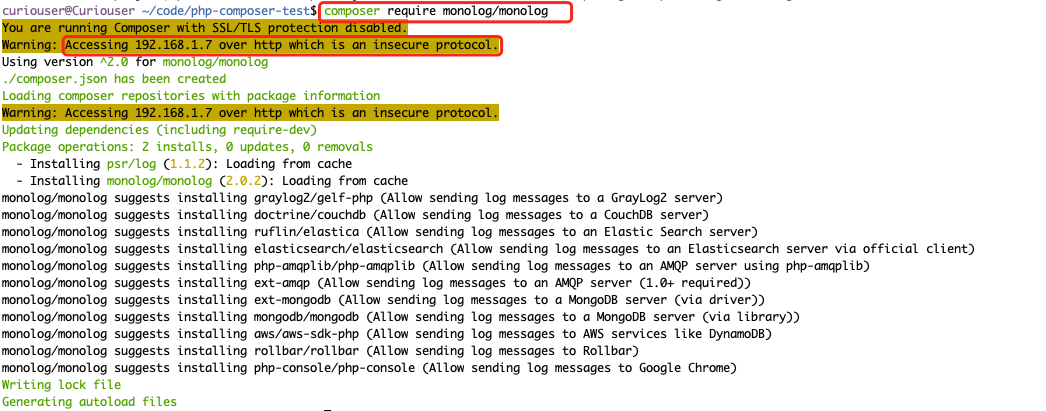
手动添加依赖
composer require monolog/monolog
4、上传包到Hosted类型的仓库中
编辑composer.json,添加项目包的信息,像名字,描述,版本号,维护者等信息。
{
  "version": "1.0",
  "name": "php-composer-test",
  "description": "this is a demo composer repo",
  "authors": [{
    "name": "curiouser",
    "email": "12345678@qq.com"
  }],
  "packagist.org": false ,
  "repositories": {
     "packagist": {
       "type": "composer",
       "url": "http://Neuxs-IP:8081/repository/composer-public/"
     }
  },
  "config": {
    "secure-http": false
  },
  "require": {
    "monolog/monolog": "1.0.*",
    "pugx/shortid-php":"v0.5.1"
  }
}
归档项目
composer archive --format=zip上传归档项目包
curl -v --user 'user:pass' --upload-file example.zip http://Neuxs-IP:8081/repository/composer-hosted/packages/upload/项目名/组件名/版本号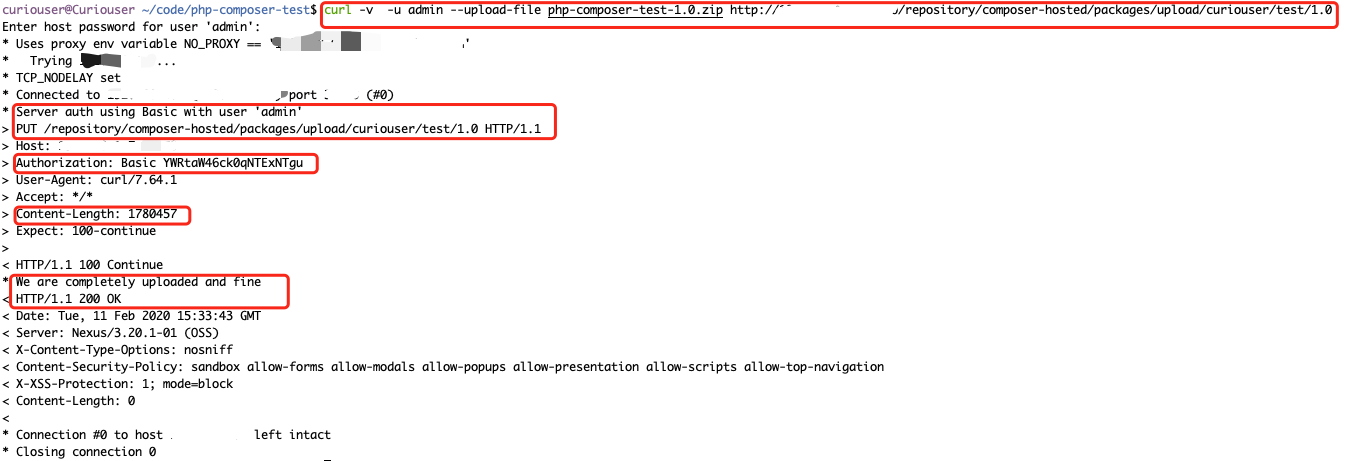
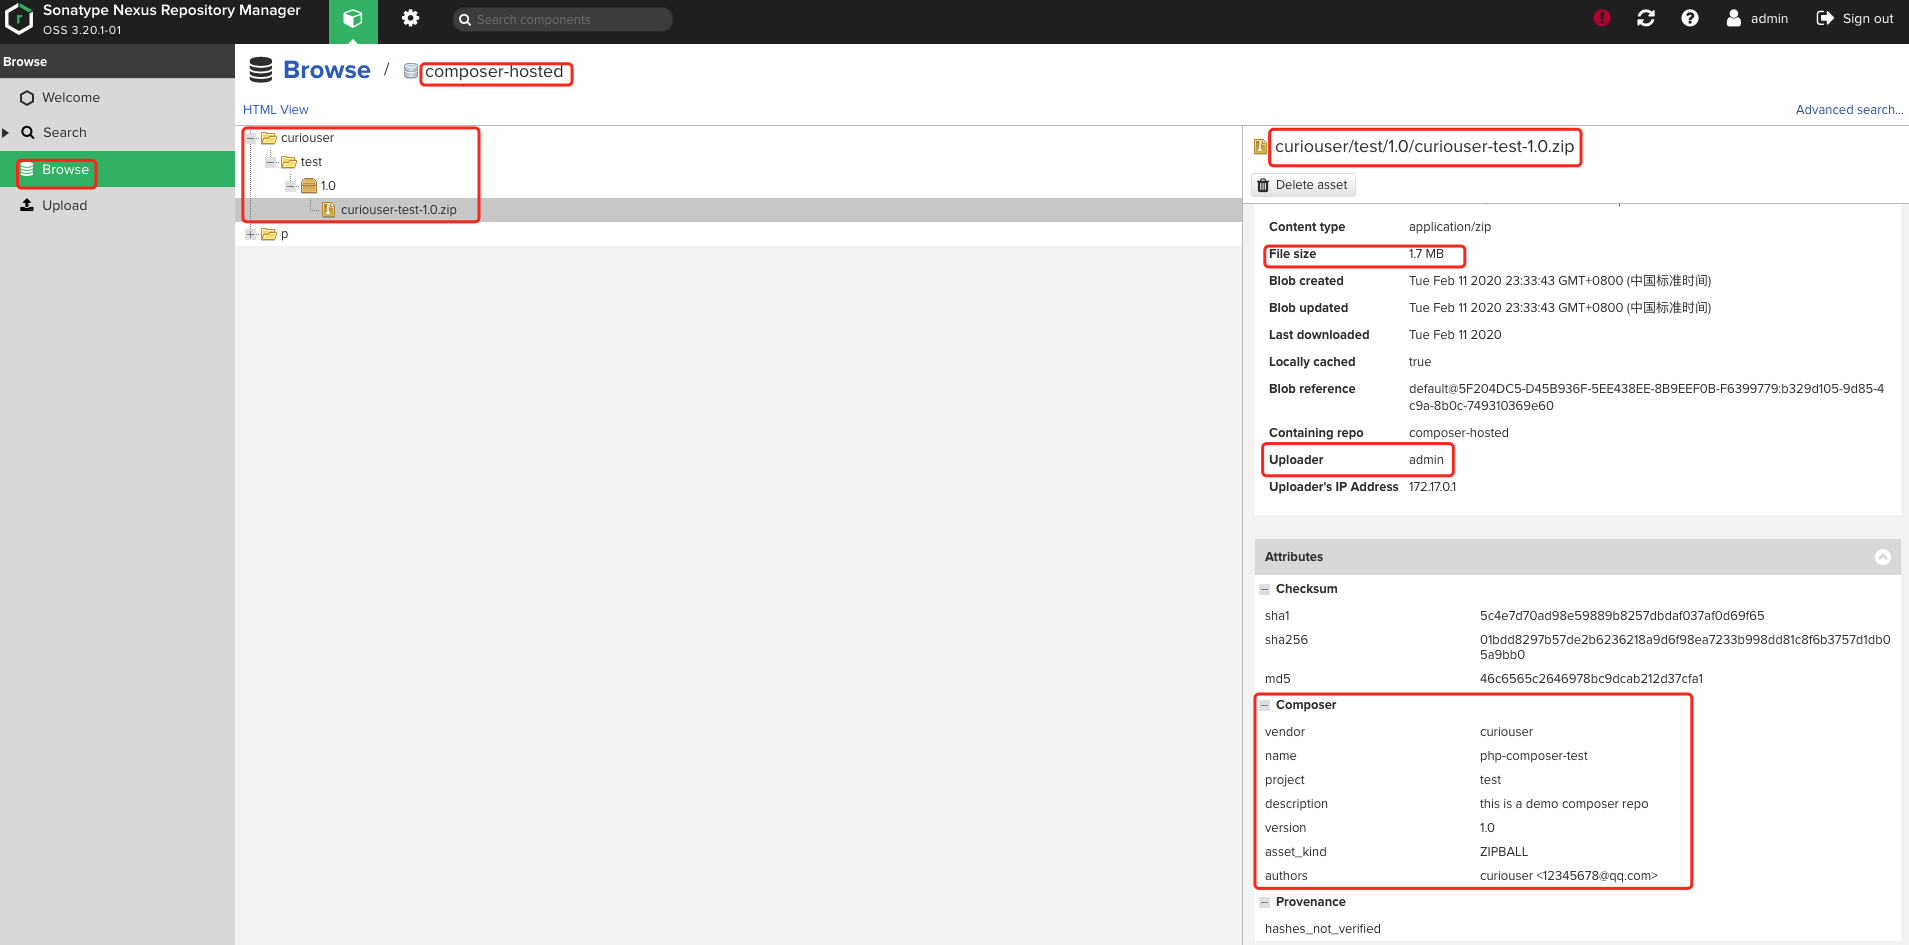
查看项目包是否已上传到Nexus中
下载引用上传的包
composer require curiouser/test:1.0